Angular CLI is one of the best tool available for angular to setup the initial files or scaffolding structure of the application.
Setup
Once you have setup the basic software like node.js and npm. You can download CLI using the following command
npm install -g @angular/cli
Once installed we can check the version of angular CLI using the following command
ng version
One common arguments every CLI has is help command. Here it is for you
ng help
Create new Angular App
From your target empty folder, you need to run the following command to generate the basic files/
ng new my-first-project
Make sure to replace ‘my-first-project’ with name you prefer. This is will your application name.
Angular CLI have lots of others option to help in setting the basic to advance files.
Available angular CLI commands
Available angular CLI commands By using command ng help, I’m getting the following information
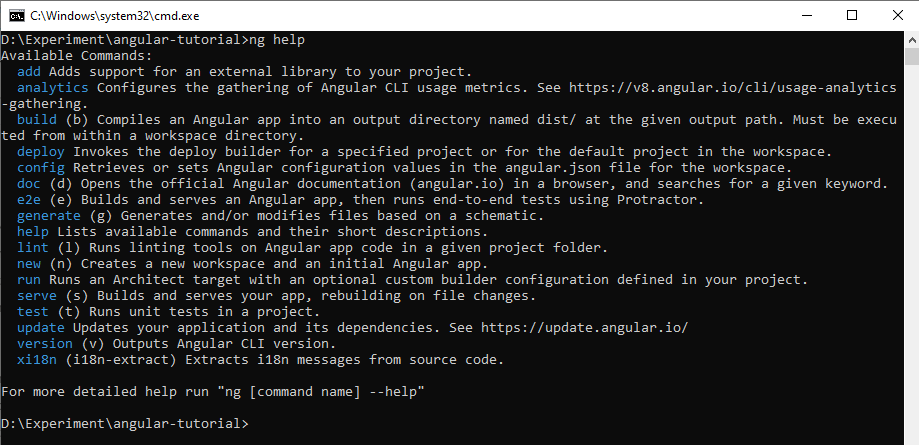
- add – Adds support for an external library to your project.
- analytics – Configures the gathering of Angular CLI usage metrics. See https://v8.angular.io/cli/usage-analytics-gathering.
- build (b) – Compiles an Angular app into an output directory named dist/ at the given output path. Must be executed from within a workspace directory.
- deploy – Invokes the deploy builder for a specified project or for the default project in the workspace.
- config – Retrieves or sets Angular configuration values in the angular.json file for the workspace.
- doc (d) – Opens the official Angular documentation (angular.io) in a browser, and searches for a given keyword.
- e2e (e) – Builds and serves an Angular app, then runs end-to-end tests using Protractor.
- generate (g) – Generates and/or modifies files based on a schematic.
- help – Lists available commands and their short descriptions.
- lint (l) – Runs linting tools on Angular app code in a given project folder.
- new (n) – Creates a new workspace and an initial Angular app.
- run – Runs an Architect target with an optional custom builder configuration defined in your project.
- serve (s) – Builds and serves your app, rebuilding on file changes.
- test (t) – Runs unit tests in a project.
- update – Updates your application and its dependencies. See https://update.angular.io/
- version (v) – Outputs Angular CLI version.
- xi18n (i18n-extract) – Extracts i18n messages from source code.
Creating new angular project
ng new timer-project
timer-project is name of project we chose.
The CLI asks us choose our required options based on our needs. Like routing and stylesheet type.
After installing package, we are good to go with debugging of the newly generated application. We can discuss about the project structure in our upcoming post.
You can checkout some of our other posts related to angular CLI
Serving the project
Angular CLI provides a complete tool-chain for developing front-end apps on your local machine. As such, you don’t need to install a local server to serve your project — you can simply, use the ng serve command from your terminal to serve your project locally.
ng serveThe application will start serving in the root http://localhost:4200
Generating angular schematic
Generates and/or modifies files based on a schematic.
ng generate <schematic> [options]
ng g <schematic> [options]
schematic can be replaced with following sets
- appShell
- application
- class
- component
- directive
- enum
- guard
- interceptor
- interface
- library
- module
- pipe
- service
- serviceWorker
- webWorker
These commands is fair to start using angular CLI in beginner mode.
Happy Coding!

3 thoughts on “Angular 9 Tutorial: Angular CLI”