Mastering Next.js: Introduction to Next.js

Day 1: Introduction to Next.js

Welcome to the first day of our in-depth exploration of Next.js, a powerful React framework that has reshaped the landscape of web development. In this tutorial, we will unravel the intricacies of Next.js, understand its profound benefits, and guide you through setting up your inaugural Next.js project. Let’s not just scratch the surface but delve into the code to grasp the key features that make Next.js a developer’s delight.

Note: We are using Next.js 14 version in this series

Understanding Next.js

Before we delve into the code, let’s grasp the essence of Next.js. Next.js is a React framework designed to simplify the process of building robust and performant web applications. It introduces conventions and tools to streamline common tasks, making it an excellent choice for modern, server-rendered React applications.

Benefits of Next.js

1. Server-Side Rendering (SSR):

Next.js excels in server-side rendering, rendering pages on the server rather than the client. This improves initial loading speed and enhances SEO.

2. Zero Configuration:

One of Next.js’ standout features is its minimal setup requirements, allowing for quick and efficient development.

3. Automatic Code Splitting:

Next.js intelligently splits JavaScript bundles for faster page loads and a smoother user experience.

4. Hot Module Replacement (HMR):

HMR allows real-time changes without a full page reload, speeding up the development process.

5. Full TypeScript Support:

Next.js has robust TypeScript integration, providing static typing for your entire project, enhancing code quality and collaboration.

Setting Up Your First Next.js Project

Let’s jump into the code and set up your first Next.js project.

Step 1: Install Node.js and npm

Before diving into Next.js, ensure you have Node.js and npm installed on your machine. You can download them from the official Node.js website.

Step 2: Create a New Next.js Project

Open your terminal and run the following command to create a new Next.js project:

npx create-next-app@latest

Step 3: Navigate to Your Project

Change into the project directory:

cd todo-app

Step 4: Run Your Development Server

Start the development server with the following command:

npm run dev

Visit http://localhost:3000 in your web browser to see your Next.js application.

The folder structure will look like this

File structure

The key structure of next.js app is

Routing Files

File / Folder nameFile extensionDetails
layout.js .jsx .tsxLayout
page.js .jsx .tsxPage
loading.js .jsx .tsxLoading UI
not-found.js .jsx .tsxNot found UI
error.js .jsx .tsxError UI
global-error.js .jsx .tsxGlobal error UI
route.js .tsAPI endpoint
template.js .jsx .tsxRe-rendered layout
default.js .jsx .tsxParallel route fallback page

These are just top-level project structures. We will have nested levels and dynamic routing levels. We can discuss them further in subsequent posts.

The folder structure of a default Next.js 14 project is as follows:

- .next/
- components/
- node_modules/
- pages/
  - api/
  - index.js
- public/
  - favicon.ico
  - vercel.svg
- styles/
- README.md
- package-lock.json
- package.json

Here’s a brief explanation of the main folders and files:

  • .next/: This folder contains the compiled output of your Next.js project.
  • components/: This folder is where you can store reusable React components.
  • node_modules/: This folder contains the dependencies installed for your project.
  • pages/: This folder is where you define your application’s routes/pages.
    • api/: This subfolder is used for setting up API routes.
    • index.js: This is the main entry point of your Next.js application.
  • public/: This folder is used to store static files like images, fonts, and favicon.
  • styles/: This folder is where you can store your CSS or SCSS files.
  • README.md: This file typically contains information about your project.
  • package-lock.json and package.json: These two files contain the dependencies and scripts needed for your project.

Note that this is the basic structure of a Next.js project and you can add more folders and files based on your specific needs.

Conclusion

Congratulations! You’ve set up your first Next.js project and explored its file structure. As we continue this series, we’ll delve deeper into advanced topics. Stay tuned for Day 2, where we will explore the intricacies of basic routing in Next.js.

Happy coding! 🚀💻

#NextJS #WebDevelopment #ReactFramework
Getting Started: Building Your First Blog with Next.js and Markdown

Introduction

In this tutorial, we will walk through the process of building a blog using Next.js and Markdown. Next.js is a popular React framework that provides server-side rendering, automatic code splitting, and other powerful features. Markdown is a lightweight markup language used for creating formatted text documents. By combining Next.js and Markdown, we can create a fast and dynamic blog with a seamless writing experience. Let’s get started!

Prerequisites: Before we begin, make sure you have the following prerequisites:

  • Basic knowledge of React and Next.js
  • Node.js installed on your machine
  • Familiarity with HTML and CSS

Step 1: Setting Up a Next.js Project To get started, let’s create a new Next.js project. Open your terminal and run the following commands:

npx create-next-app my-blog
cd my-blog

Step 2: Installing Dependencies Next, let’s install the required dependencies for our blog. We need gray-matter to parse the Markdown files, and remark and remark-html to convert Markdown to HTML. Run the following command:

npm install gray-matter remark remark-html

Step 3: Creating Markdown Files In the root of your project, create a posts directory. Inside the posts directory, create a new Markdown file with the following content:

markdownCopy code---
title: My First Blog Post
date: 2023-06-01
---

# Welcome to My Blog!

This is my first blog post. Enjoy!

Step 4: Creating the Blog Page In the pages directory, create a new file called blog.js. In this file, let’s create a component that will fetch the Markdown files and render them as blog posts. Add the following code:

import fs from 'fs';
import path from 'path';
import matter from 'gray-matter';
import { remark } from 'remark';
import html from 'remark-html';

export default function Blog({ posts }) {
  return (
    <div>
      <h1>My Blog</h1>
      {posts.map((post) => (
        <div key={post.slug}>
          <h2>{post.frontmatter.title}</h2>
          <p>{post.frontmatter.date}</p>
          <div dangerouslySetInnerHTML={{ __html: post.content }} />
        </div>
      ))}
    </div>
  );
}

export async function getStaticProps() {
  const postsDirectory = path.join(process.cwd(), 'posts');
  const fileNames = fs.readdirSync(postsDirectory);

  const posts = await Promise.all(
    fileNames.map(async (fileName) => {
      const filePath = path.join(postsDirectory, fileName);
      const fileContent = fs.readFileSync(filePath, 'utf8');
      const { data, content } = matter(fileContent);

      const processedContent = await remark().use(html).process(content);
      const contentHtml = processedContent.toString();

      return {
        slug: fileName.replace(/\.md$/, ''),
        frontmatter: {
          ...data,
          date: data.date.toISOString(), // Convert date to string
        },
        content: contentHtml,
      };
    })
  );

  return {
    props: {
      posts,
    },
  };
}

Step 5: Styling the Blog Page Let’s add some basic styles to make our blog page look better. Create a new CSS file called blog.module.css in the styles directory and add the following code:

.container {
  max-width: 600px;
  margin: 0 auto;
  padding: 20px;
}

.post {
  margin-bottom: 20px;
}

.title {
  font-size: 24px;
  font-weight: bold;
}

.date {
  color: #888;
  font-size: 14px;
}

.content {
  margin-top: 10px;
}

Update the Blog component in blog.js to include the CSS classes:

import styles from '../styles/blog.module.css';

// ...

export default function Blog({ posts }) {
  return (
    <div className={styles.container}>
      <h1>My Blog</h1>
      {posts.map((post) => (
        <div key={post.slug} className={styles.post}>
          <h2 className={styles.title}>{post.frontmatter.title}</h2>
          <p className={styles.date}>{post.frontmatter.date}</p>
          <div
            className={styles.content}
            dangerouslySetInnerHTML={{ __html: post.content }}
          />
        </div>
      ))}
    </div>
  );
}

Step 6: Running the Application Finally, let’s run our Next.js application and see our blog in action. Run the following command:

npm run dev

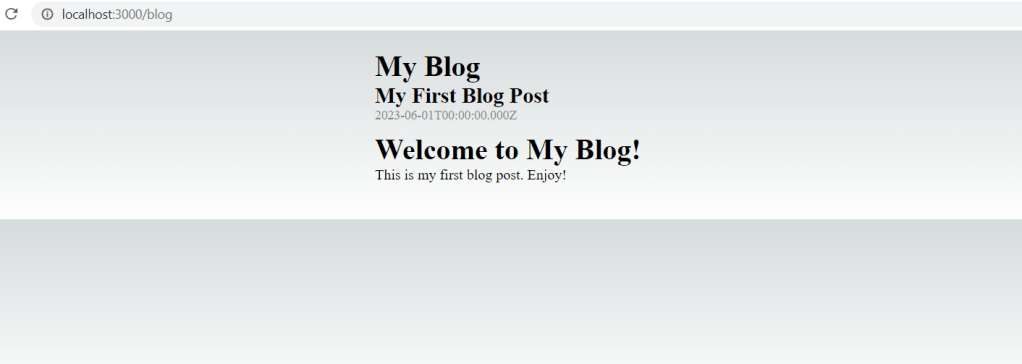
Visit http://localhost:3000/blog in your browser, and you should see your blog with the first post displayed.

Conclusion

In this tutorial, we learned how to build a blog using Next.js and Markdown. We covered the steps to set up a Next.js project, parse Markdown files, and render them as blog posts. We also added basic styling to enhance the appearance of our blog. With this foundation, you can expand the blog functionality by adding features like pagination, category filtering, and commenting. Happy blogging!

I hope this detailed tutorial helps you build a blog using Next.js and Markdown. Feel free to customize and extend the code to suit your specific needs.