VS Code is one of the popular editor in the world of web development.
It’s became major part of my day to day web development cycle.
I’ve used lots of shortcuts or tricks or best practices over the period of time.
In this post, I would like to present to some of the steps that I’ve been using in my development works.
VS Code Insiders
Insiders is a pre-release of standard edition of vs code.
You can install and use it in parallel with standard edition.
Mostly, it’s a kind of nightly build. You will be getting updates daily or weekly basis based on commits happening in vs code insider.
Insider edition has a green icon whereas standard edition has an icon in blue in color.
When you start using insider, you’ll be the first person receiving the latest features and bug fixes compared to the one using standard edition.
Breadcrumbs
Sometimes we will be working with the small screen machines. Keeping the solution explorer always open isn’t an optimal solution when we are working on the small screen laptops. One of the solutions can be keeping the files hidden and opening whenever needed.
In that case, traversing between files or folders is bit difficult.
To resolve this problem, we have option called breadcrumbs in VS Code.
Breadcrumb navigation lets you jump to symbols and files in your workspace.
Breadcrumbs shows the current location and allows you to quickly navigate between symbols and files. To start using breadcrumbs, enable it with the View > Toggle Breadcrumbs command or via the breadcrumbs.enabled setting.
You can modify the user settings by visiting the settings page using shortcut CTRL +, or visiting the option File>Preferences>settings
In the search bar, search for the option breadcrumbs. You can find the following UI
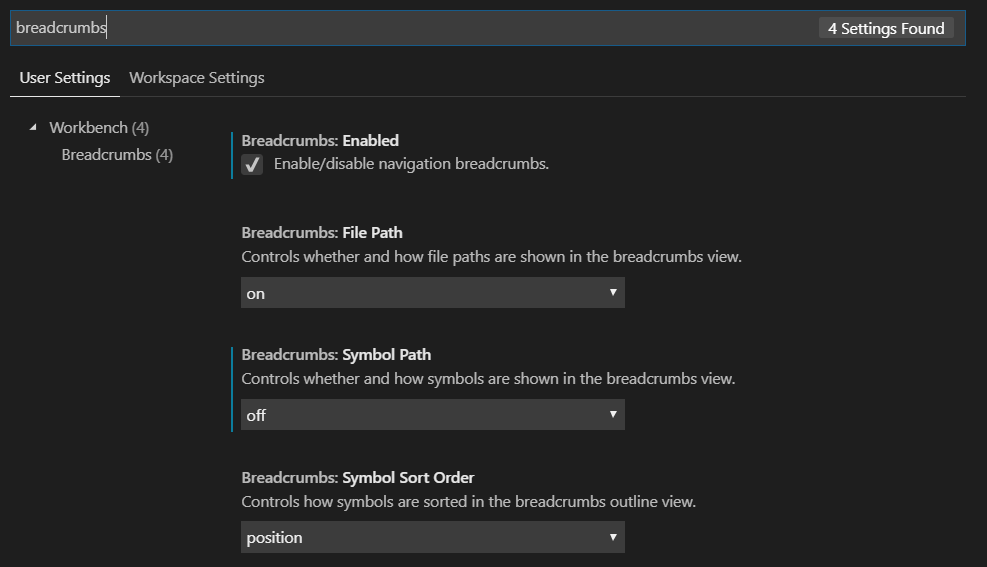
I usually enable the breadcrumbs for File Path, because don’t use symbol path navigation. You can use the available options based on your needs.

Log Points
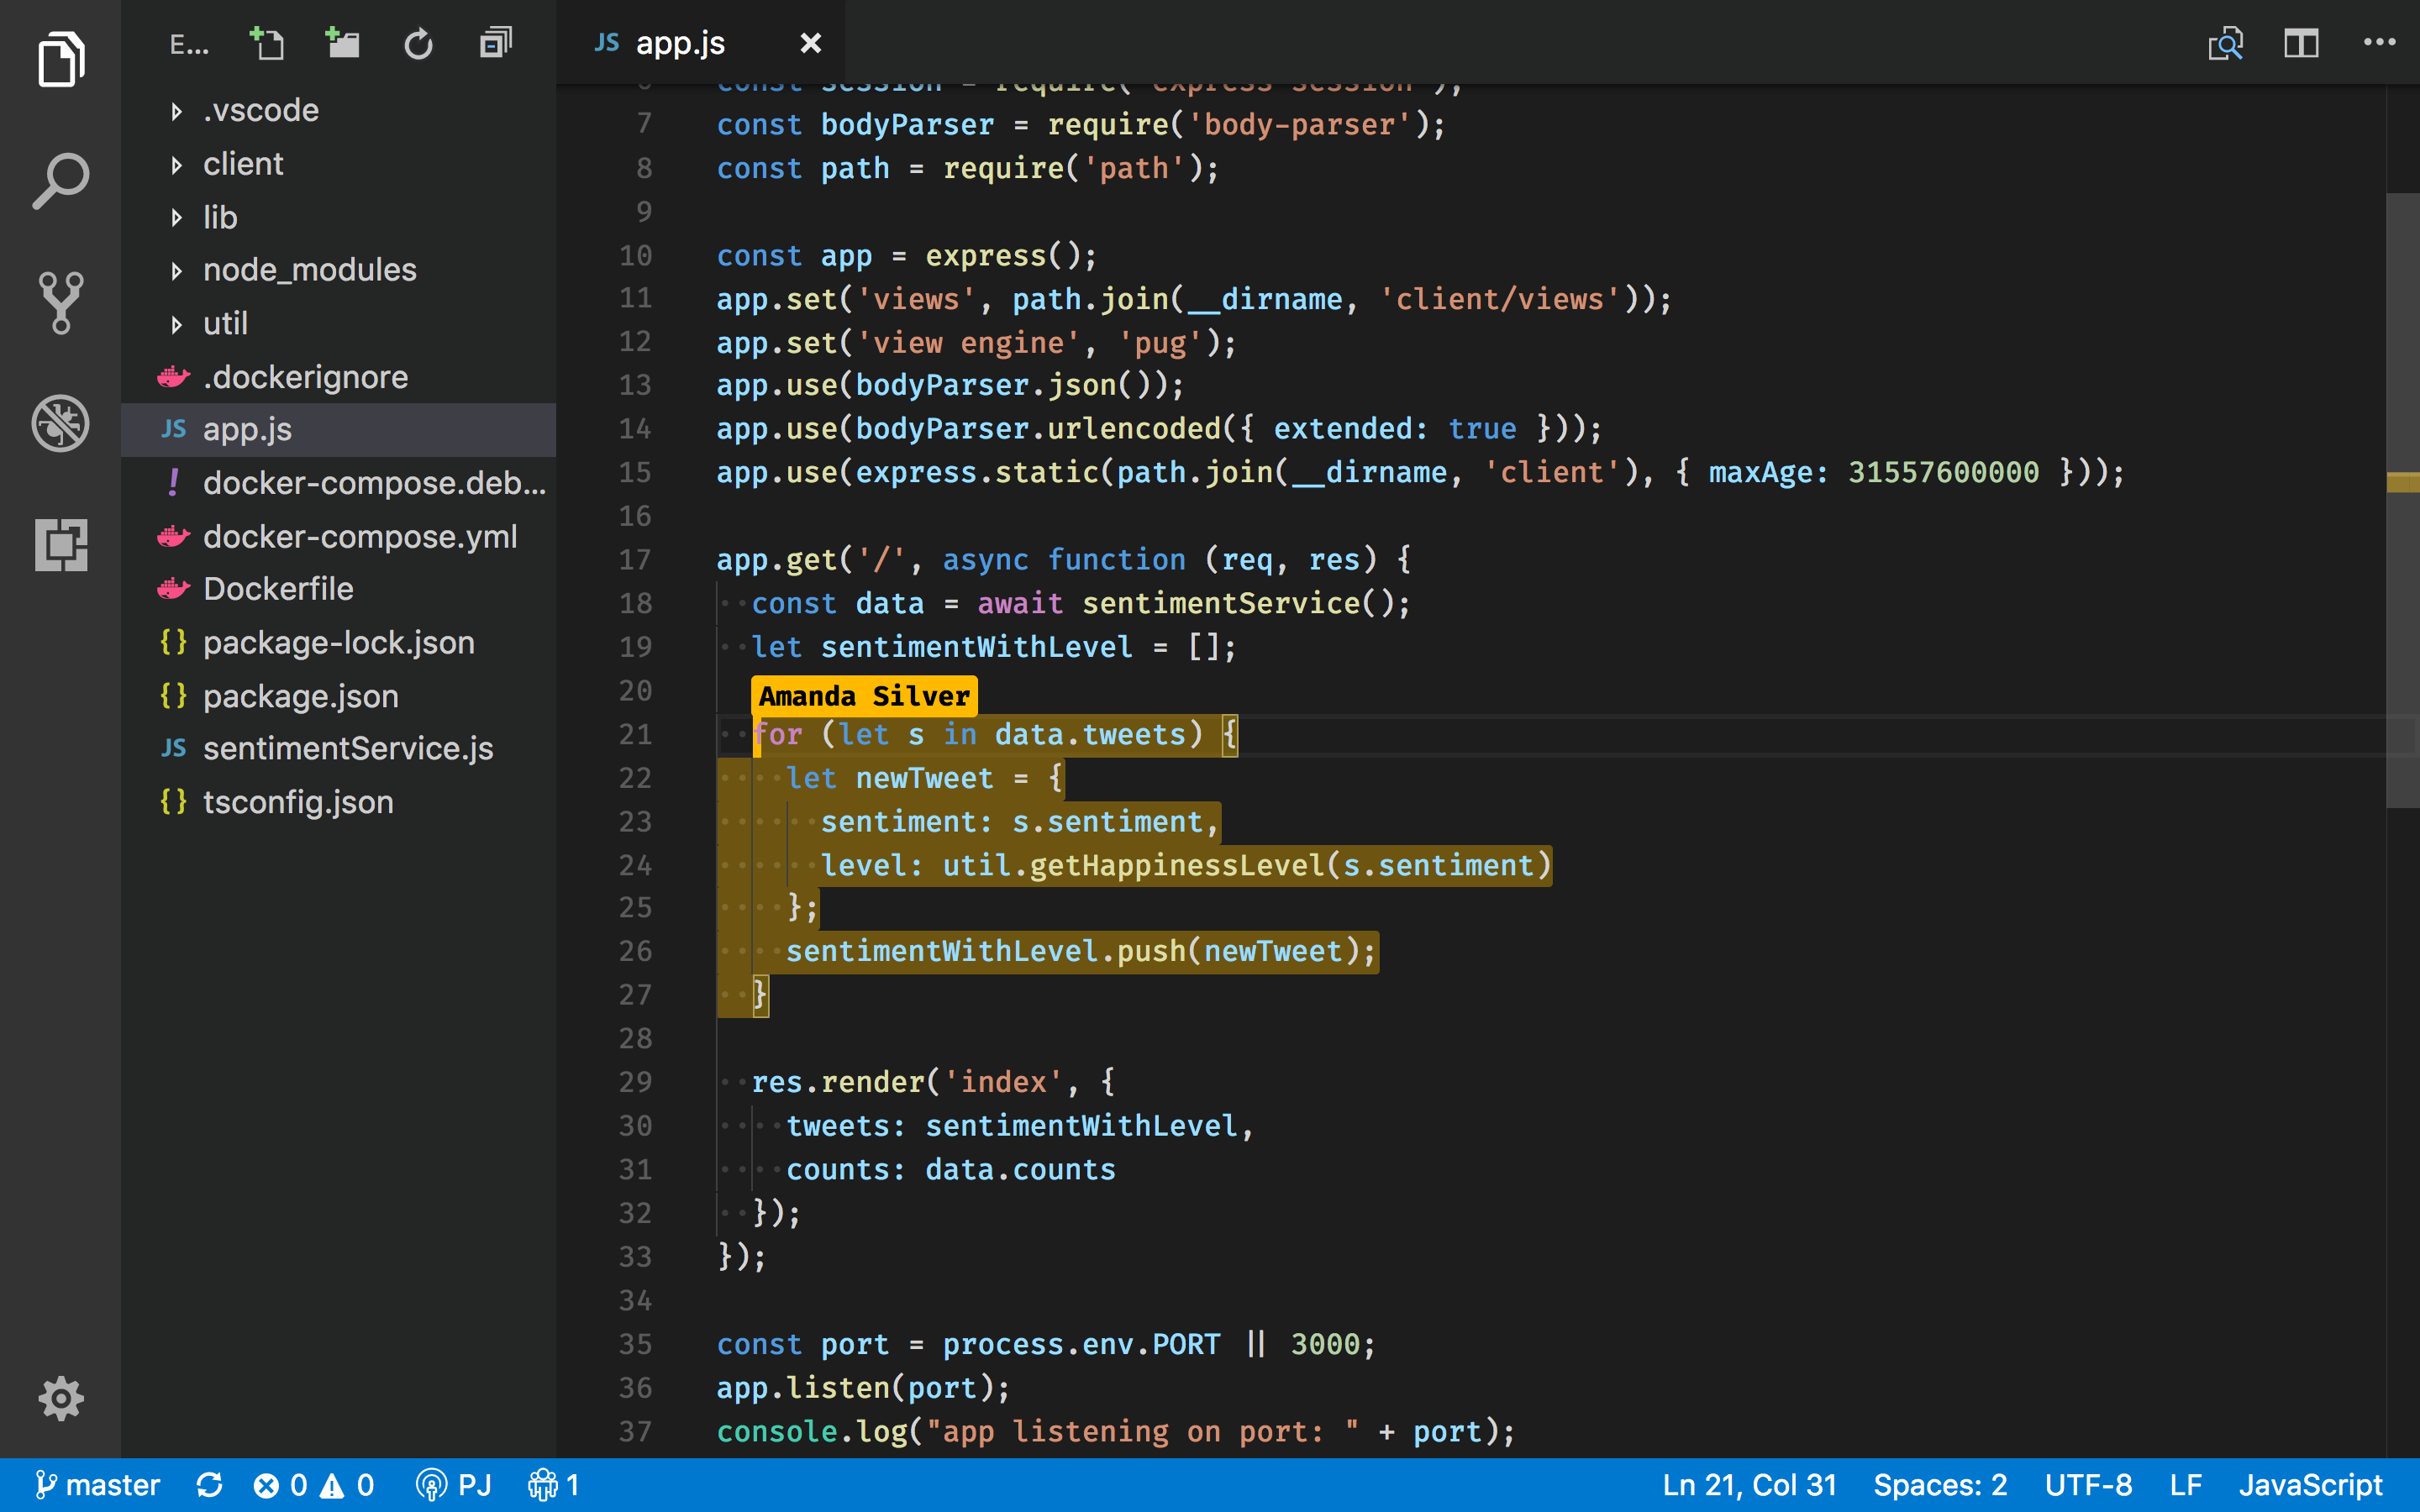
Log Points is one of favorite feature in recent times. Log point can be added similar to breakpoint in code.
A log point is represented by the diamond icon. Log Points are useful for injecting the logs while debugging.
A Log point is a variant of a breakpoint that does not “break” into the debugger but instead logs a message to the console.
Just like regular breakpoints, Log points can be enabled or disabled and can also be controlled by a condition and/or hit count.
Why Log Points?
Mostly, when we are working with JavaScript or TypeScript we use console.log(..) for logging some messages. Sometimes we forgot to remove those debugging related messages while shipping application to Production or Customer.
When we are using Log Points, we don’t have to worry about this problem. Because Log Points message are available only in debugger mode.
Log messages are plain text but can include expressions to be evaluated within curly braces (‘{}’).

External Terminal
I’m great fan of Integrated terminal option since it is released. Even though I prefer external terminal to run the node related build commands.
Sometimes I accidentally close the VS Code instance, that time my terminal also get terminated. To avoid that I started using the external terminal build related commands.
The shortcut in Windows OS for VS Code to launch the external terminal is
Crtl + Shift + c
By default, the external terminal is set to command prompt of Windows. We can change it based on our needs.
For example, We can change it to Git bash or any other third party terminals.
You can use the settings page to change the mentioned changes like below

Emmet
Emmet is a set of plug-ins for text editors that allow for high-speed coding and editing in HTML, XML, XSL, and other structured code formats via content assist.
Nowadays all the editors come up with code completion or syntax suggestion intellisense.
However, Emmet got some cool features like syntax abbreviation, improves HTML, CSS workflow. Using Emmet we can quickly write a bunch of code, wrap code with new tags.
Your favorite editor may be Atom, Sublime, Brackets or something else. Emmet supports most of your favorite editors.
Check this link on how to integrate Emmet with your editor.
It’s a plugin, you can install or integrate with your code editors.
The one good news is that we don’t have to download & install the Emmet in VS Code.
Emmet is built in with VS Code, no extension is required. OK, that’s the base story; now let’s start with how to use the features.
How to expand Emmet abbreviations?
Emmet abbreviation and snippets are enabled by default for HTML, haml, jade, slim, jsx, XML, xsl, CSS, scss, sass, less and stylus files.
Mostly, the Tab key is used to complete the code abbreviation. We have to type the syntax and click the tab key to expand the abbreviations.
We expand the single HTML tag or even expand the hierarchy of HTML tag at the same time by clicking the tab key.

An important change is that the Tab key is no longer the default way to expand Emmet abbreviations. Instead, Emmet abbreviations will now appear in the suggestion list. They can be selected like any other smart completion and on selection, the abbreviation will be expanded.
We can quickly view the Emmet abbreviation by clicking the info icon next to list shown. By typing text next to hash (#) will be taken as id and text next to the period(.) will be considered as a class name. Emmet basically works related to CSS selectors.

And also we can create multiple lists of the same syntax with unique id as well.

We can generate lorem ipsum text with the default number of words or a certain number of text by mentioning the word count.

Let’s see some CSS abbreviation example as well

To experience more HTML & CSS shortcode check this out link https://docs.emmet.io/cheat-sheet/ (The complete cheat sheet for HTML and CSS.)
Live Share
Live Share enables your team to quickly collaborate on the same codebase without the need to synchronize code or to configure the same development tools, settings, or environment.
When you share a collaborative session, your teammate sees the context of the workspace in their editor. This means your teammate can read the code you shared without having to clone a repo or install any dependencies your code relies on. They can use rich language features to navigate within the code; not only just opening other files as text but using semantic analysis-based navigation like Go to Definition or Peek.
Inline breakpoints
Inline breakpoints will only be hit when the execution reaches the column associated with the inline breakpoint. This is particularly useful when debugging minified code which contains multiple statements on a single line.
An inline breakpoint can be set using Shift+F9 or through the context menu during a debug session. Inline breakpoints are shown inline in the editor.
Inline breakpoints can also have conditions. Editing multiple breakpoints on a line is possible through the context menu in the editor’s left margin.
Summary
I will be updating this same post regularly based on the new tips or tricks if I come across anything new.
Happy Coding!