I have been using the Cisco AnyConnect as my primary VPN Client for the past few months. The simple view of the client is really impressive and productive.
Whenever I want to connect to my VPN host I will type my VPN host address in the text of VPN client and click connect. It’s pretty easy when we are using only one VPN profile. It will remember our last used setting/profile details with it.
But when I need to switch to another VPN network, I have to delete the VPN host address and retype the new VPN host address. I have searched on the Internet and found how to set the multiple profiles in VPN client.
To set multiple profiles in Cisco AnyConnect VPN client. We have to add an XML config file with name “Profile.xml”
The file has to be placed in the following path
C:\ProgramData\Cisco\Cisco AnyConnect Secure Mobility Client\Profile
Profile.xml
<?xml version="1.0" encoding="UTF-8"?>
<AnyConnectProfile xmlns="http://schemas.xmlsoap.org/encoding/">
<ServerList>
<HostEntry>
<User>username</User>
<HostName>host alias name</HostName>
<HostAddress>host address of vpn</HostAddress>
</HostEntry>
</ServerList>
</AnyConnectProfile>
We have to provide our VPN details inside the HostEntry tag which is under ServerList.
whereas
<User> is username of our VPN account
<HostName> is our alias name of profile
<HostAddress> is URL of VPN host or IP address
Example
<?xml version="1.0" encoding="UTF-8"?>
<AnyConnectProfile xmlns="http://schemas.xmlsoap.org/encoding/">
<ServerList>
<HostEntry>
<User>Pandiyan</User>
<HostName>MyHost</HostName>
<HostAddress>local.pandiyan.com</HostAddress>
</HostEntry>
</ServerList>
<ServerList>
<HostEntry>
<User>Guest</User>
<HostName>MyGuest</HostName>
<HostAddress>guest.pandiyan.com</HostAddress>
</HostEntry>
</ServerList>
</AnyConnectProfile>
Once we have added the profile config file, we have to restart our VPN client instance. Once we restarted the VPN client will look as follows
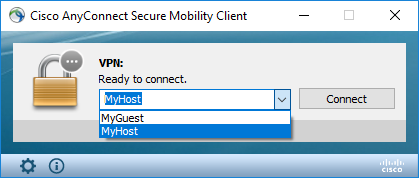
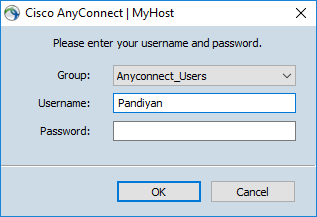
We can able to choose our profile from the drop down, and when we try to load our profile the username will be auto filled using the value of User field in the config file.
I have tried these setting on my Windows 10 machine. It’s working fine for me, you guys try out and let me know your feedback in comment section.
Happy Working!

